In the first part of this story I explained just how I came to be in the possession of a European PlayStation 3, even though I’m smack dab in the middle of the United States. As a refresher, this unit was a launch model, capable of running PlayStation 2 software as well as the PlayStation 3 and PlayStation series software that every PS3 console can run. It came in not powering up, but caught my attention as a possible project to work on, but first we needed to know what shape it was in.

As I mentioned in the last article, launch era PlayStation 3 consoles were prone to failure in ways quite similar to the Xbox 360. While not as rampant, one still has to presume most original model PlayStation 3’s are non-working unless they are proven to otherwise be functional — the same as one would treat an Xbox 360 of the same vintage.
Given that this system wouldn’t power up at all the natural first step towards testing it was to check the power supply. By using a multimeter to check for voltage and bridging two pins on one of the power supply connectors one can jump start the power supply and check that it works. If it does show the right voltages, then it’s very likely any problems with the system would be on the main board, which would be an instant no-go for me doing any more work on the system — it just wouldn’t be worth it.
As it would turn out, we got no power whatsoever. Great, this means the power supply is dead, right?
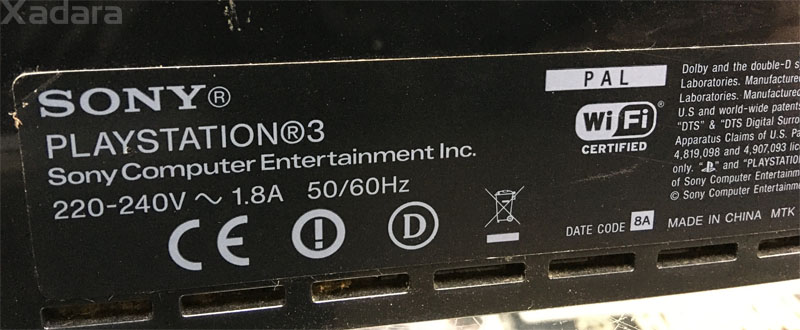
Hold that thought. Remember in the last article how I mentioned the label at the back of the console gave a clue as to what the issue may have been? This is where it comes into play.

The power grid (what we will call “mains power” going forward) of the United States is generally 120 volts at 60 cycles per second.
The mains power for Europe generally is 240 volts at 50 cycles per second.
In this case the frequency (cycles per second) doesn’t matter, but in some cases it’s critical. Now, power supplies designed to handle both 120 and 240 volt mains input exist, and are actually incredibly common, be it just a simple toggle switch or some active circuitry which detects the input voltage and steps things down accordingly — one way or the other a power supply like this is designed to convert incoming AC mains power into the 12 and 5 volts DC that the system runs on — so long as the power supply works on a given input, the PlayStation 3 will work fine regardless of where it’s being used.
In this case, however, the power supply was rated for only 220-240 volt input — it wasn’t designed to detect or use 120 volt AC power as provided here in the United States, meaning the power supply wasn’t getting enough voltage to work!
I only noticed this once I took out the power supply and looked at the specification plate on it. I didn’t notice on the back label at all that it said 220-240 volts! Such a silly oversight on my end, but at that time I didn’t study the label beyond the PAL region indication.
In any case, our first thought was to swap out the power supply. The problem was we had just sold off our leftover stock of power supplies for the original model of PlayStation 3, as we rarely needed them and they were taking up too much space. This left me without an easy-to-get power supply, but didn’t leave me without an option to at least begin to test things.
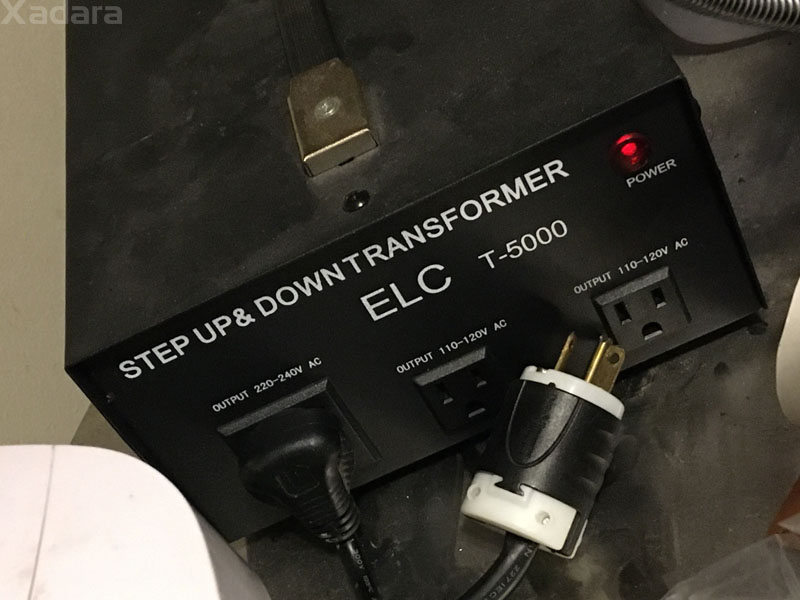
In the back of the shop we have a reflow station. This is a large heater, basically, which is used for large soldering projects of a special nature. Being such a device, it actually runs off of 240 volts, as opposed to 120. We use a converter for this process as the building doesn’t have the usual 240 volt supply that, let’s say, a house would for its clothes dryer.

This was a chance to see how the system would behave with the proper voltage available. Would it start? Would it boot safely or would it go to a “yellow light of death” as so many PlayStation 3 consoles before it had?
There was only one way to find out. I took the unit to the back, unplugged the reflow station, plugged in the PlayStation 3 and flipped the power switch on the converter, then the system itself.
Red light. The system went into standby, meaning the power supply was at least functional. Excellent.
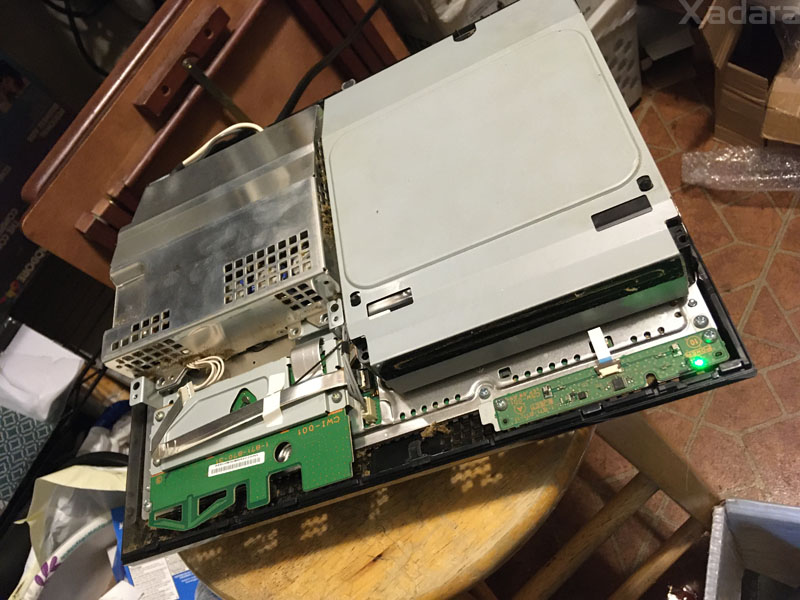
Then came the moment of truth. The system was still open, and I didn’t have a monitor or anything connected — the goal was to simply see if it would boot or not. I touched the sensor area, and watched as the system came to life. The fan started, the hard drive spun up, and the system status light went green and stayed that way.

I felt damn pleased with the state of things — I knew at the very least the motherboard was good. To check if the optical drive was at least likely functional I stuck a random game in and heard the system seem to read the disc. Everything sounded normal, leading me to feel that I indeed had a likely fully functional system on my hands — one that would need quite a cleanup, a new power supply able to operate with 120 volts, and most critically to make it useful to me, a mod job.
Given that the system would be very limited at its stock configuration (remember, it’s European so it’s region-locked from running any non-PAL PlayStation or PlayStation 2 games, DVD’s and Blu-Ray’s) the system was a perfect candidate for me to attempt a “custom firmware” install on. This mod job would remove these region restrictions and provide quite a few additional options on what to use the system for beyond just playing some games.
At this stage, though, that was just an eventual plan. I still needed to see just what I was working with on this particular machine.
In part 3 we’ll take a look at just that — what exactly I actually had in front of me.

1 Comment
Add a Comment